How to Build Your Own MST3k Live!-style Tour Jacket
2022-01-31Where This Starts
In 2018, MST3k turned 30, and so did I. I celebrated this by getting VIP tickets to the Anniversary tour’s Boston stop. This is where I first saw the fantastic tour jackets Jonah, Joel, and the various other performers have:

After the Q&A, I checked out the merch stand, hoping this was something they had a limited quantity of so I could throw an absurd amount of money at the problem; alas, these aren’t for sale. Luckily, I could throw a slightly-more-reasonable amount of money at the problem by making my own, and so I did in 2019 after scoping out the various bits and pieces.
Background and MST3k’s Aesthetics
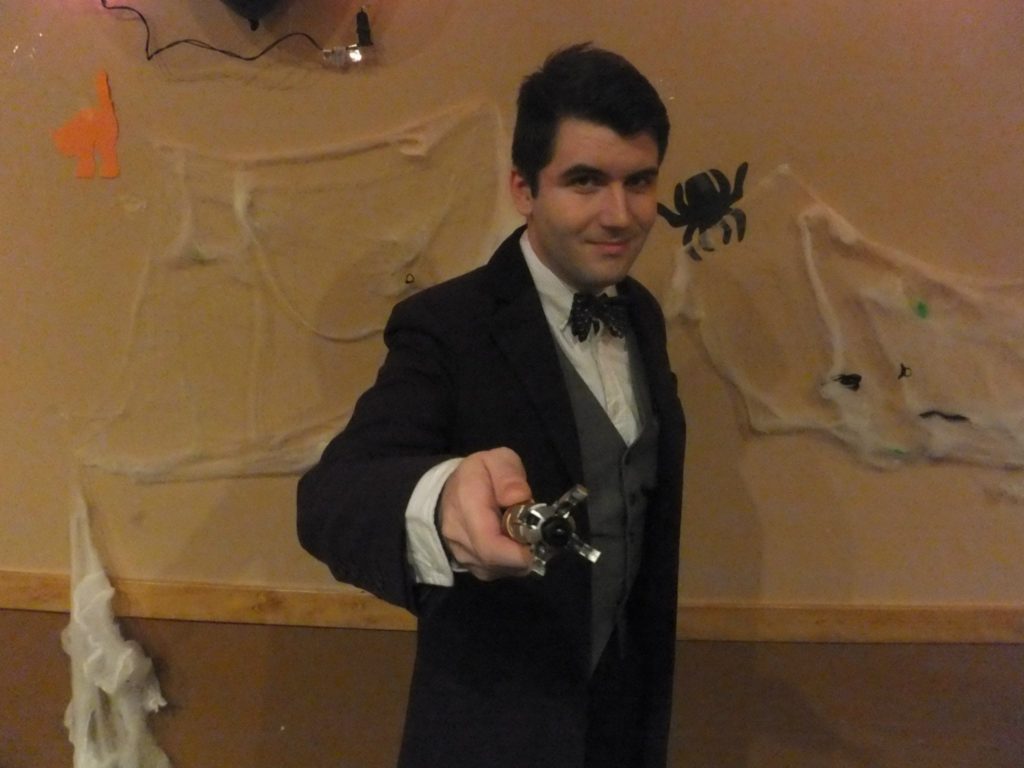
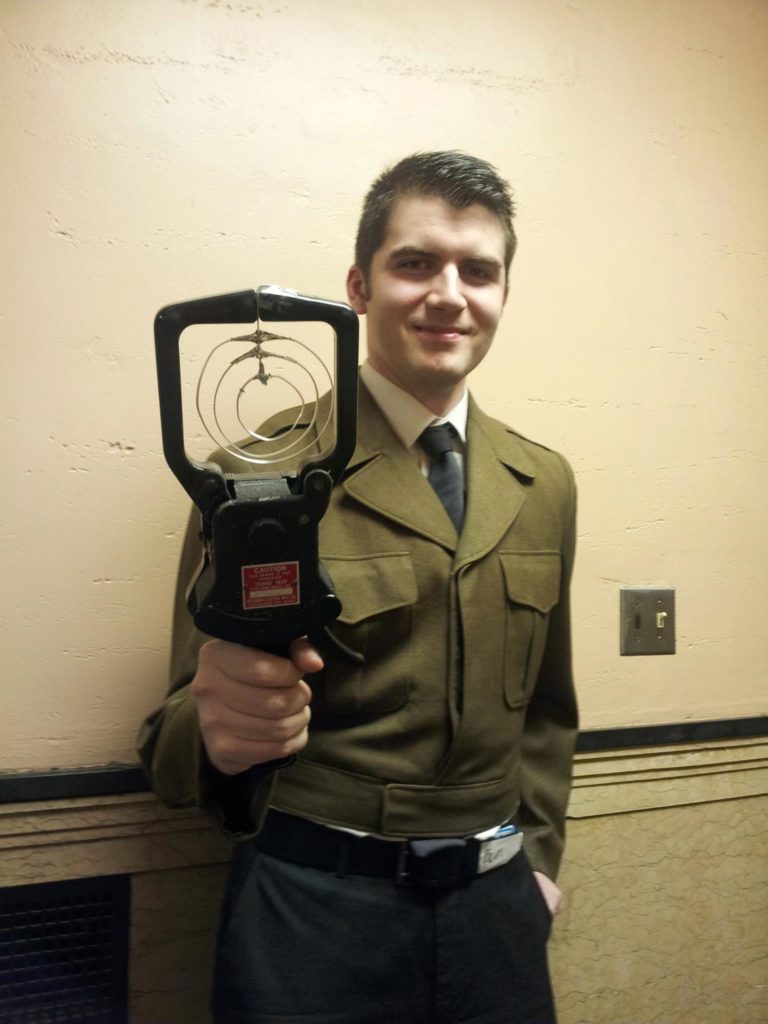
I’m no stranger to MST3k cosplay, having built out both a Jonah-yellow jumpsuit in 2017 for the first live tour and a Bonehead outfit for a halloween party later that year (though that one largely happened the same year because I found the right kind of swim vest in my size for $20 on eBay and jumped on it)

When I’m building out a costume, I tend to go for shows where I can see the bits and pieces of what things are made of fairly easily. This is partly why I love Mystery Science Theater’s aesthetic – since the show’s original incarnation, it’s been very happy for you to see its home-spun nature where you can tell everything that’s been glued to the wall and spray-painted gray.
This also extended to this project – I just needed to find the right jacket, get it the right color, and add the appropriate patches.
What You’ll Need
If you want to make one of these jackets for yourself, here’s what you’ll need:
The Jacket
The tour jackets are a cotton military-style jacket with a ribbed collar and cuffs. In an ideal world, I’d be able to find one in white so I could dye it from scratch, but I found this one on Amazon that had the right style and general pocket placement. The “Khaki 2” color here isn’t as ideal as a white jacket would be, but it’s light enough that it’s workable, and since it’s cotton, that also means it’s more dye-able than a poly blend.
As with any article of clothing from Amazon where the brand name sounds like they banged on the keyboard a few times, read the sizing info carefully – I typically wear a size medium and I ordered a large here and it fits great.
Fabric Dye
We’re going to be over-dyeing the jacket since we’re dealing with a garment that’s an existing color we’re working around. For Jonah’s sunny yellow, I used two bottles of RIT liquid dye, golden yellow. If you’re looking to do green, red, or purple (for Mike, Joel, or Emily), I’d refer to the RIT website for a color consult – they’ll give you the combo of dyes you need to get to that color, though keep in mind you may not get that exact shade since you’re dealing with the original khaki of the jacket.
I also picked up a package of RIT’s color remover for this project to try and “prime” the jacket beforehand, but I’m not actually sure if it did actually had any effect. More on that later.
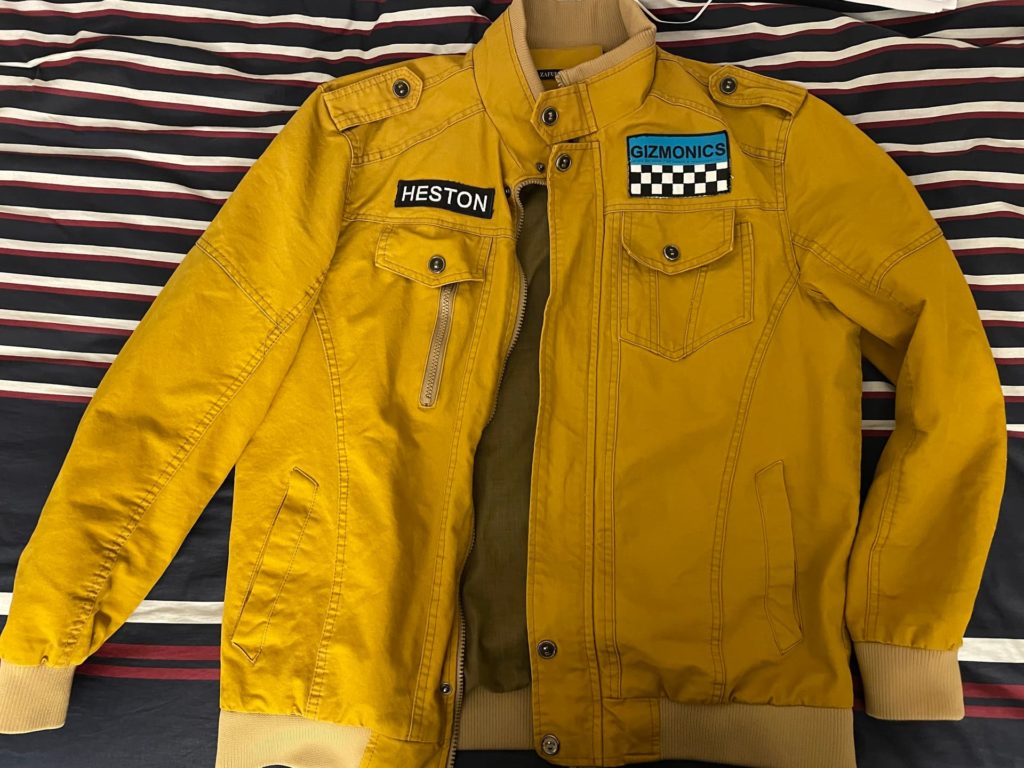
MST3k Patches
Support your friendly online Etsy iron-on patch maker – there are lots of sellers that will generate the nametag and Gizmonics patches you’re looking for, and sometimes they’ll even sell you a set of them. Since we want slightly smaller ones for this jacket (as opposed to a jumpsuit), I went with the smaller Heston and blue Gizmonics patches from NeitherSparky’s store. I thought about getting some sort of sleeve patch, but ultimately decided to just keep it clean.
Other Supplies
I live in an apartment building where I don’t have my own washing machine, so I did this with a lot of hot water and some plastic storage containers from Target that could hold enough water, the dye, and have some room at the top left over. If you do have washing-machine access, I’d follow that dye method (and potentially adjust your dye quantity accordingly).
Otherwise, make sure you have some containers to dye in (that you can quickly fill with hot enough water), gloves and protective gear (so that you dye the jacket, not yourself), and a pair of tongs or something to easily get your fabric in and out of your various bins.
Live and Let Dye
(sorry for the pun, I’m trying to delete it)
Alright, once you’ve got your jacket, the first step is to dye it. Literally just follow the process on the RIT website/dye bottle in terms of quantities, time, etc. I did a round of their color remover and the jacket first – that may have primed things to better absorb the dye, but it didn’t do any visible “removal” of the jacket’s original color like I might have expected.
You want to over-dye this since it’s starting with something that’s an existing color. Follow the instructions on the package, let it hang out a little longer than you think it may need, and it should all turn out.
Again, if you have the opportunity to use RIT’s washing machine method, that’s probably a better way to ensure even dyeing. If not, I had decent success with some plastic storage containers and turning the jacket with a pair of tongs to keep everything submerged in the dye.
Once you’re done dyeing the jacket, run it through the dryer so that all your hard work stays put. RIT also has dye fixative – I didn’t use it on this project and it was fine, but if you want some extra insurance, apply that as the last stage of applying dye.
Patch Time!
With our sturdy beautiful tote bag jacket now emblazoned over it’s entire surface with the color brown yellow, we can give it some personality with patches.
Iron-on patches are easy to apply! Get your iron on its hottest setting (we’re dealing with cotton here), make sure there’s no water in the tank (we just want it HOT), and use an old pillowcase as a layer between the jacket and your iron while you press each patch on for a minute. It’s just that easy. Sometimes it take a few sessions for this to fully fuse, but once it’s been applied and cooled, it’s all set.
And that’s it! The dye part is a little scary, but RIT makes it pretty foolproof. Apologies for the lack of process photos, but I promise this is a good, straightforward project if you’re cosplay-minded.
Other Work
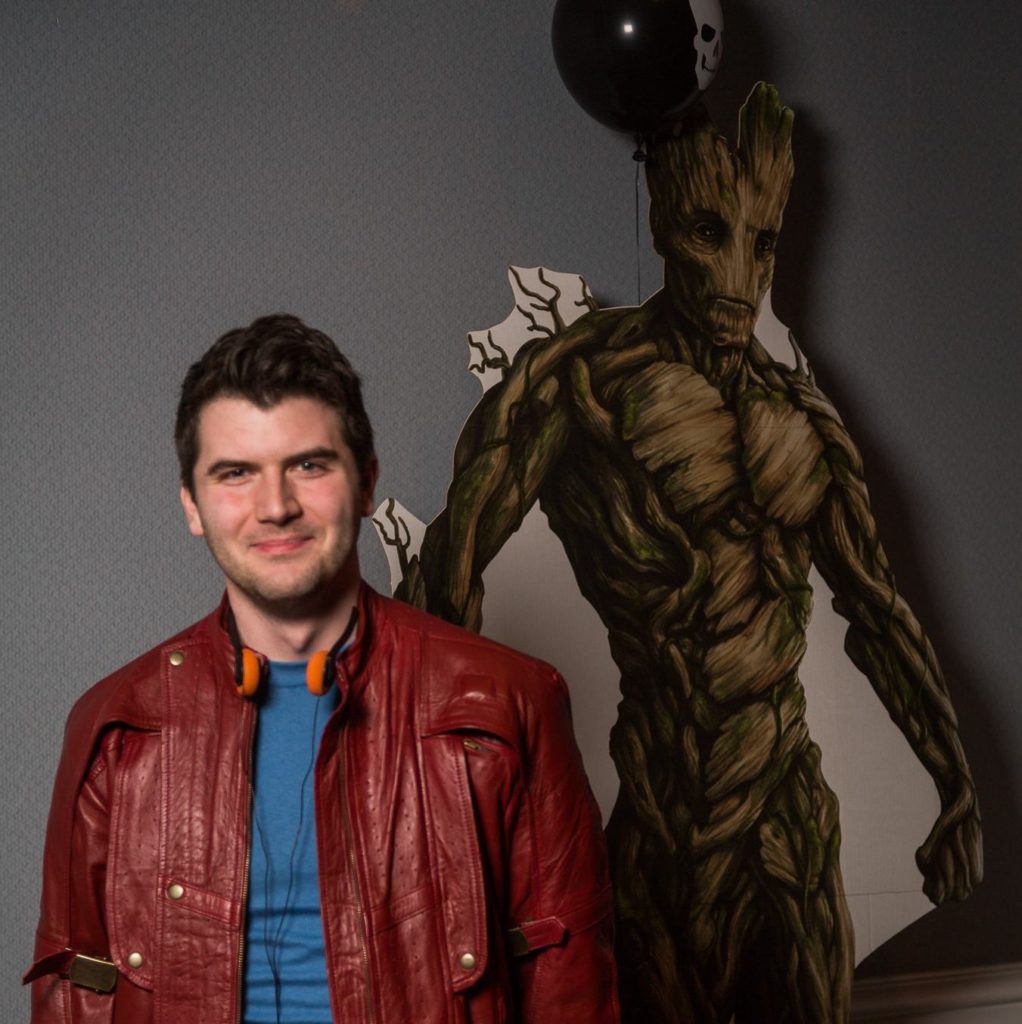
If you liked this, you’ll probably like my write-up of how to make the Mr. Music jacket from John Mulaney’s Sack Lunch Bunch special. I’ve also pulled together various Doctors Who, The Middleman, and Star-Lord for various Halloween parties: